
How to fix keyboard keys sticking on laptop usually comes down to one of three causes: gunk under the keycap, a spill that left residue, or a mechanical issue with the scissor switch or keycap itself. The good news is that many “sticky key” problems are fixable at home with a careful, low-risk cleaning routine.
If you type for work or school, a sticking key is more than annoying, it can cause repeated characters, missed shortcuts, and a lot of slowdowns. And if the cause is liquid, waiting too long can make corrosion more likely, which is where repairs get expensive.
This guide helps you diagnose what kind of stickiness you have, choose the safest fix, and avoid the common mistakes that turn a simple cleaning into a broken key. I’ll also call out when it’s smarter to stop and use a repair shop, especially on thin modern laptops.
Why laptop keys start sticking (the real-world causes)
“Sticky” can mean different things, and the fix changes depending on what you feel. A key can be slow to return, physically tacky, or it can actuate but not register consistently.
- Debris buildup: crumbs, skin oils, and dust can bind the edges of a keycap, especially on frequently used keys like Space, Enter, and Shift.
- Spill residue: water can leave minerals, coffee leaves sugars, soda leaves sticky syrup, energy drinks are often the worst. Even if it “dried,” residue keeps grabbing.
- Damaged or mis-seated keycap: the cap can clip on slightly crooked, so it rubs the frame and feels stuck.
- Scissor switch or stabilizer problem: larger keys use stabilizers; if a stabilizer wire pops loose, one side can stick.
- Swollen battery or chassis flex: less common, but if multiple keys suddenly feel wrong, the keyboard deck can warp.
According to Apple Support, using compressed air with a specific spray pattern can help clear debris from keys on some Mac notebooks. Even if you use Windows, the takeaway is the same: start with the least invasive method.
Quick self-check: what kind of “sticking” do you have?
Before you pry anything up, spend two minutes identifying the pattern. This avoids “over-fixing” a simple issue.
- One key only sticks and feels gritty: often debris or a mis-seated cap.
- One key sticks and feels tacky: often spill residue.
- Several nearby keys stick: often spill spread or grime drift under the keyboard edges.
- Key feels physically fine but repeats characters: could be software settings, or the switch is failing.
- Large key (Space/Enter/Shift) sticks on one side: stabilizer issue is likely.
Also check your environment: if you recently cleaned with household spray, that can leave residue that attracts dust, making keys feel worse a week later.
Try the safest fixes first (no key removal)
When people search how to fix keyboard keys sticking on laptop, they often jump straight to removing keycaps. On many laptops, that’s where clips snap. Start simpler.
Step 1: Power down the right way
- Shut down fully (not just sleep).
- Unplug the charger and any peripherals.
- If your model allows it, disconnect the battery or follow the manufacturer’s safe procedure.
If you suspect a spill happened recently, avoid pressing keys repeatedly “to test,” because you can push liquid deeper.
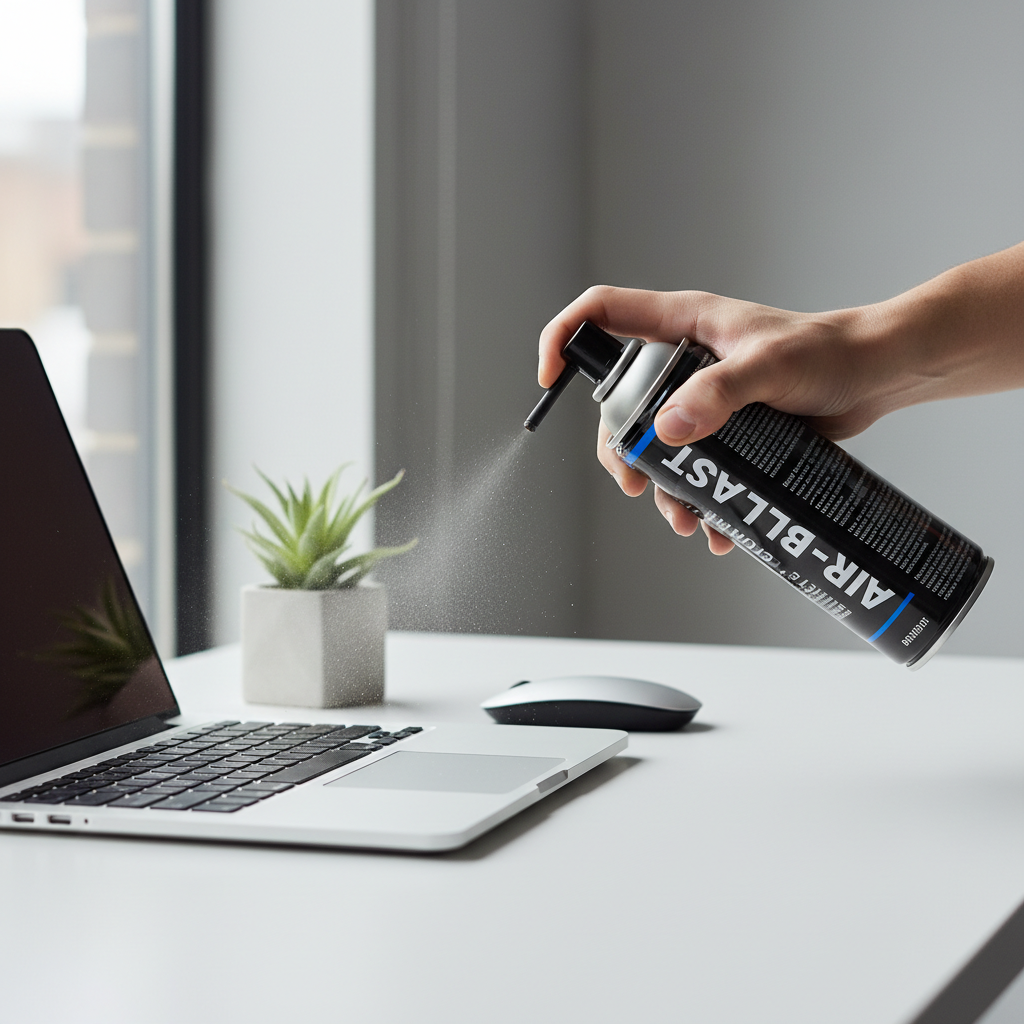
Step 2: Dry clean with gentle tools
- Compressed air: use short bursts, keep the can upright, spray at an angle, not straight down.
- Soft brush: a clean, dry, soft-bristle brush can loosen edge debris.
- Vacuum (optional): use a keyboard-safe mini vacuum on low power, avoid strong household vacuums that can pull keycaps.
According to OSHA, compressed air used for cleaning should be handled carefully to reduce risk of injury. In practice, keep it controlled, never spray skin, and avoid blasting debris toward your face.
Step 3: Spot-clean the key edges (light moisture, not soaking)
- Use 70% isopropyl alcohol on a microfiber cloth or foam swab, it evaporates faster than water in many cases.
- Wipe around the edges of the sticky key, then press the key repeatedly to work it in.
- Keep liquid out of gaps; you want “damp,” not dripping.
If the key improves after 30–60 seconds of pressing, you’re probably dealing with residue at the perimeter rather than deep under the mechanism.
When you should (and shouldn’t) remove a keycap
Keycap removal is where laptop keyboards vary a lot. Some models tolerate it, some don’t. If you’re unsure, search your exact laptop model plus “keycap removal” and look for manufacturer guidance or reputable teardown videos.
Don’t remove keycaps if you have a butterfly-style mechanism, extremely thin keys, or you already see cracked plastic. In those cases, cleaning around the key and seeking service is often safer.
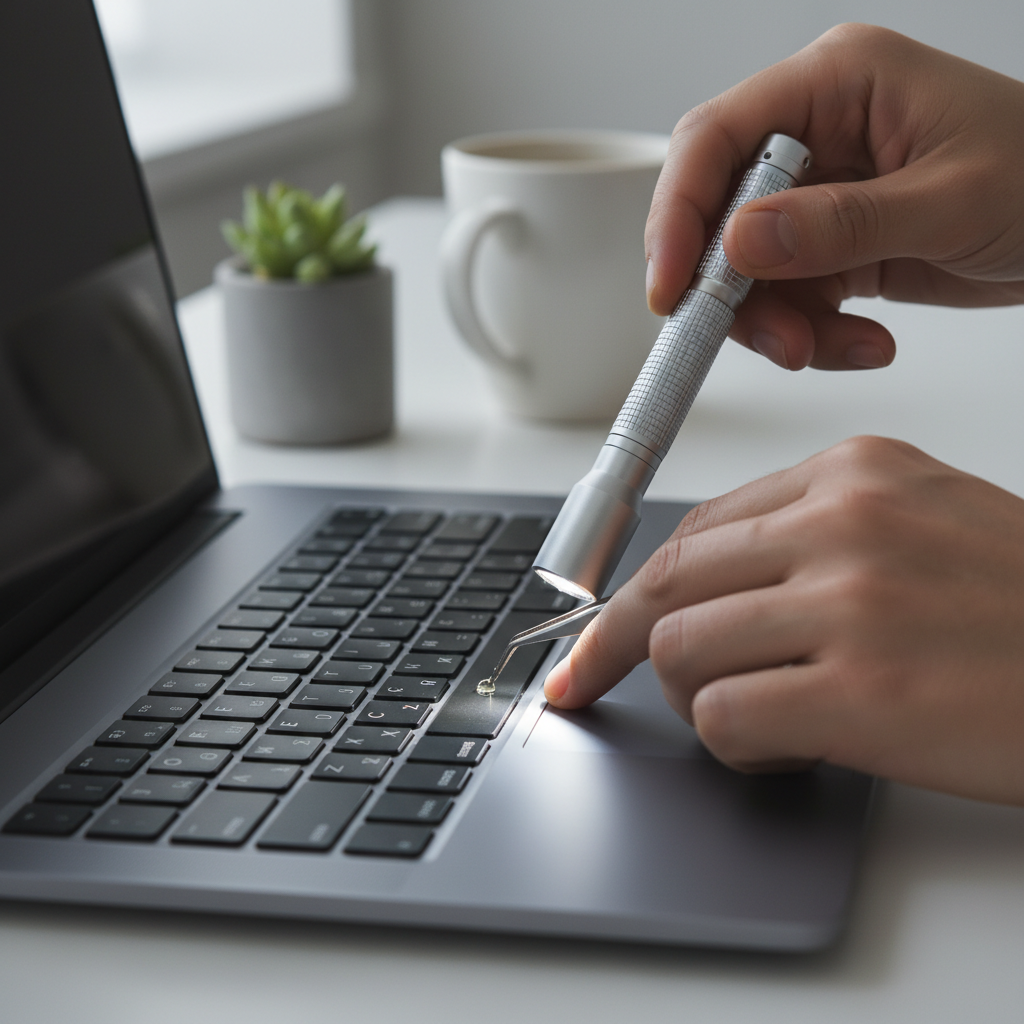
If you choose to remove a keycap, do it carefully
- Use a plastic pry tool, not a metal screwdriver.
- Pry gently from the top edge, minimal force, watch for clip points.
- Take a photo before you touch the scissor switch or stabilizer pieces.
Clean under the cap (light-touch method)
- Remove visible debris with tweezers, avoid scratching the membrane.
- Use a small amount of isopropyl alcohol on a swab for sticky residue.
- Let it dry fully before reattaching, then snap the keycap back evenly.
If the scissor switch pops off and you’re not sure how it re-seats, stop. Forcing it usually bends the tiny hinges.

Fixes by scenario: crumbs, spills, and stabilizer issues
Different situations need different levels of effort. Here’s a practical “match the fix to the mess” map.
Scenario A: Crumbs or dust (no spill)
- Compressed air + brushing usually solves it.
- If one key still binds, edge-clean with alcohol.
- If the key rubs the frame, check that the keycap sits flat, then re-seat by pressing evenly.
Scenario B: Dried sugary spill (coffee/soda/juice)
- Expect the stickiness to return if you only surface-wipe; sugars migrate.
- Try repeated edge-cleaning with alcohol and key-pressing cycles.
- If it remains tacky, consider keycap removal only if your keyboard design supports it.
If liquid reached deeper layers, a proper teardown cleaning may be needed. That’s the point where DIY can turn risky, especially on laptops with glued batteries or ribbon cables.
Scenario C: Spacebar or Shift sticks on one side
- Inspect for uneven travel: press left and right ends separately.
- A stabilizer wire may be misaligned; re-seating can fix it, but the parts are easy to bend.
- If the keycap clips look stressed, skip forcing it and plan for a replacement keycap or service.
Sticky key or software problem? A quick sanity check
Sometimes the key feels normal but behaves wrong on screen. Before you keep cleaning, rule out settings.
- Windows: check Sticky Keys/Filter Keys accessibility settings, and keyboard repeat rate in Control Panel or Settings.
- macOS: check Keyboard settings for Key Repeat/Delay Until Repeat, and accessibility features.
- Test externally: plug in a USB keyboard, if the problem disappears, your laptop keyboard is the likely source.
If the same key repeats across apps and after a reboot, hardware is more likely. If it happens only in one app, software or input settings can be the culprit.
Practical table: choose the right fix (and what to avoid)
Use this as a quick decision aid when you’re in the middle of troubleshooting.
| What you notice | Likely cause | What to do | Avoid |
|---|---|---|---|
| Key feels gritty, slow return | Debris under/around cap | Compressed air, brush, edge-clean | Flooding gaps with cleaner |
| Key feels tacky after spill | Sugar residue | Alcohol swab, repeated presses, careful deeper clean | Vinegar, soapy water, WD-40 |
| Spacebar sticks on one side | Stabilizer mis-seat | Inspect, gentle re-seat, consider service | Forcing clips, bending wire |
| Many keys suddenly bind | Spill spread, chassis warp | Power off, dry, assess, consider repair | Heat gun/hair dryer on high |
| Key feels fine but repeats | Settings or switch failure | Check accessibility, test external keyboard | Endless cleaning with no change |
Common mistakes that make sticky keys worse
A lot of laptop keyboard damage happens during “helpful” cleaning. These are the patterns that show up again and again.
- Spraying cleaner directly into the keyboard: it can pool under the membrane and create new problems.
- Using oils or lubricants: they trap dust and can degrade plastics. If a mechanism truly needs lubrication, that’s typically a service-level repair.
- Pulling keycaps straight up with force: many laptop caps unclip in a specific direction, brute force snaps hinges.
- High heat drying: hot air can warp keycaps or soften adhesives. If you must dry, use room-temp airflow and time.
- Ignoring early spill signs: a key that starts sticking days after a spill often means residue is still present.
When it’s time to get professional help
DIY makes sense when the issue is localized and clearly debris-related. It’s smart to pause and consider a repair shop or manufacturer service when the risk climbs.
- Recent liquid spill and multiple keys affected, especially if the laptop shut off or behaved oddly.
- Key mechanism damage such as broken clips, loose scissor parts, or a keycap that won’t reattach.
- Battery swelling signs like a bulging trackpad, wobbling chassis, or new gaps in the case. This can be a safety issue, consider professional evaluation.
- Business-critical device where downtime costs more than a proper repair.
If you still want to troubleshoot, consider testing with an external keyboard while you schedule service. It keeps you productive without further stressing the built-in keyboard.
Key takeaways and a simple action plan
If you’re trying to figure out how to fix keyboard keys sticking on laptop, start with gentle dry cleaning, then move to light alcohol spot-cleaning, and only then consider keycap removal if your model supports it. Most people get results by matching the method to the cause, not by using stronger chemicals.
- Do today: power down, compressed air at an angle, brush, then edge-clean the problem key.
- If it’s a spill: expect residue, plan for repeated cleaning or service if multiple keys are affected.
- If it’s mechanical: don’t force clips, replacement keycaps or a pro repair often saves time and damage.
If you want a faster path, write down your laptop model, what spilled, and which keys stick, then decide whether to clean, replace a keycap, or book service based on the risk.
FAQ
How do I fix sticky keys on a laptop without removing the keys?
Use short bursts of compressed air at an angle, then brush between key gaps. If the key still binds, wipe around the key edges with a lightly dampened swab using 70% isopropyl alcohol, then press the key repeatedly to work it in.
Can I use water or disinfectant wipes to clean a sticky laptop keyboard?
Water can work for surface wiping, but it evaporates slowly and can slip into gaps. Disinfectant wipes may leave residue. Many people have better luck with a microfiber cloth and a small amount of isopropyl alcohol, used carefully.
Why is only my spacebar sticking on one side?
Large keys usually rely on a stabilizer to keep travel even. If the stabilizer shifts or a clip loosens, one side can feel stuck. Gentle inspection can help, but forcing the cap often breaks the tiny mounts.
My key feels sticky after coffee, but it’s dry. What now?
“Dry” often means the liquid evaporated, not that the sugars disappeared. Try repeated edge-cleaning with alcohol and pressing cycles. If the tacky feel returns quickly, residue may sit deeper and service can be worth it.
Is WD-40 safe for laptop keys that stick?
Usually not a good idea. Oils can attract dust and may affect plastics. If a switch truly needs lubrication, it’s typically beyond routine cleaning and better handled by a technician.
How do I know if it’s a hardware problem or Windows settings?
Check accessibility features like Sticky Keys or Filter Keys, then test with an external keyboard. If the problem persists only on the laptop keyboard across apps and after reboot, hardware is more likely.
Should I replace the whole keyboard if one key is sticking?
Not automatically. One sticky key is often debris or residue, and sometimes a replacement keycap set solves it. If the underlying mechanism is damaged or many keys are affected after a spill, a full keyboard replacement becomes more reasonable.
If you’re dealing with recurring stickiness after a spill or you’re not sure your laptop keycaps are removable, a local repair shop or the manufacturer support channel can be a more “no surprises” option than trial-and-error cleaning at home.